
Explore CLM Code#
Now that you have downloaded CLM into your workspace, it is useful to become familiar with its directory structure. In this exercise, you will explore the main areas of the CLM source code and learn where key tools and model components are located.
Specifically, in this exercise we will:
Step 1. Locate your CLM source code directory (
$SRCROOT).Step 2. Examine the CIME Directory area.
Step 3. Examine the Model Components area.
Step 4. Take a closer look at the CLM source code (‘src’).
For the current tutorial on derecho, the path to the CLM code is:
$SRCROOT = /glade/u/home/$USER/code/my_clm_code
Figure: Detailed view of the CESM3 Code Directory 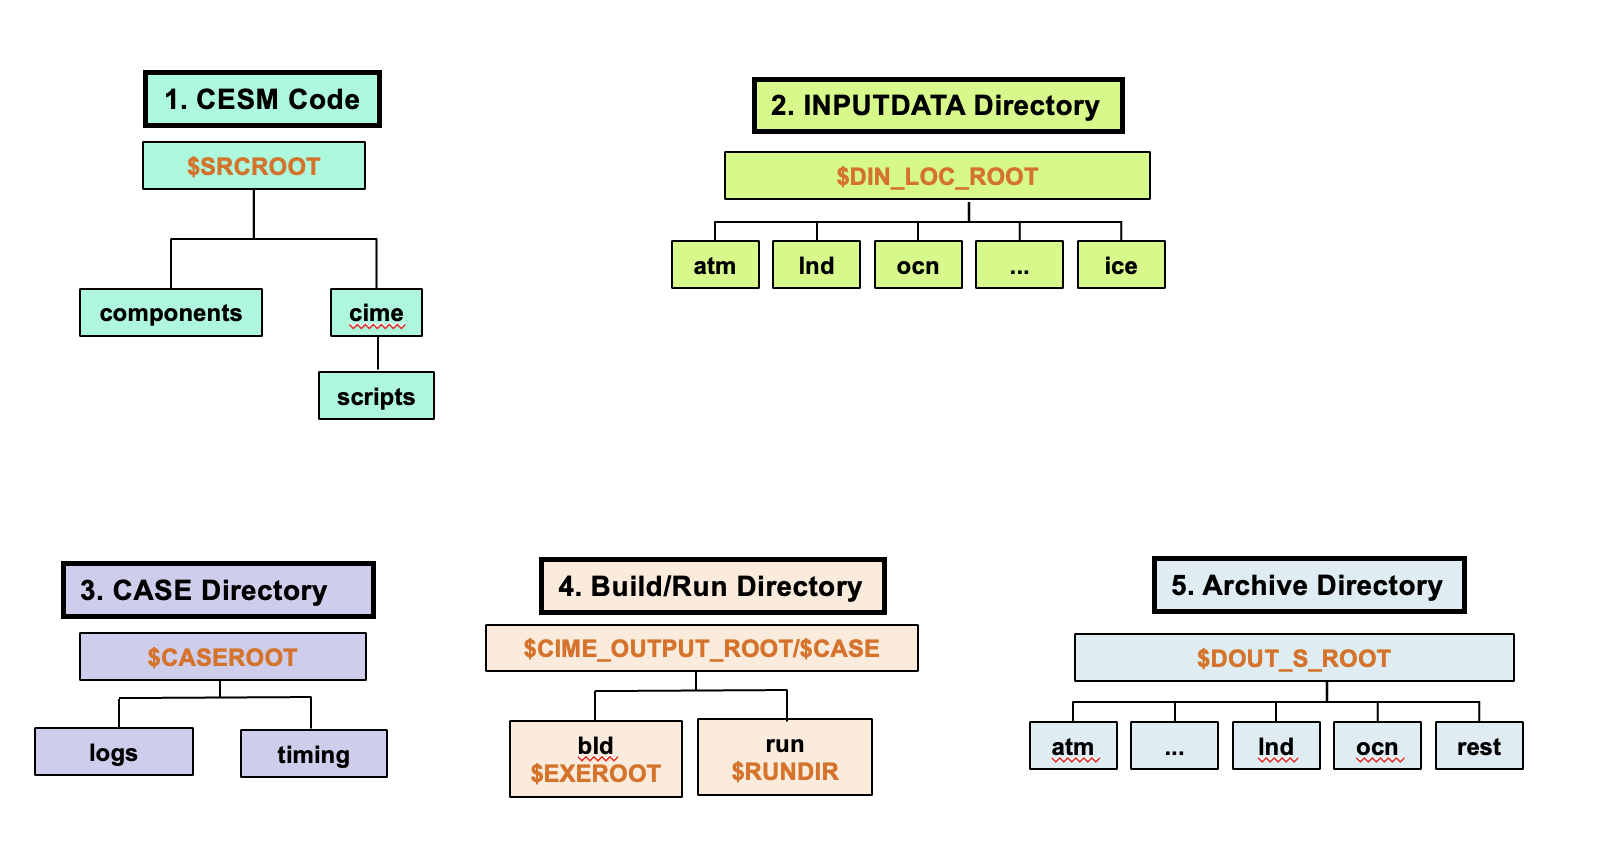
Step 1. Locate Your CLM Source Code Directory#
Before exploring the CLM source tree, let’s first determine where we are currently located in the file system and navigate to the CLM code directory ($SRCROOT) if we are not already there.
Open a terminal and determine your current working directory:
pwd
The expected output is:
/glade/u/home/$USER/code/my_clm_code
If your output matches the path above, you are already in the CLM source code directory and can continue to the next step. (If you have not done anything since the last exercise then you will already be in the $SRCROOT location)
If your output is different, navigate to the CLM source code directory:
cd /glade/u/home/$USER/code/my_clm_code
You are now located in your CLM source code workspace ($SRCROOT).
To see the contents of the directory, use:
ls -1
You should see several directories and files, including:
bin
bld
ccs_config
cime
cime_config
components
doc
libraries
lilac
manage_externals
parse_cime.cs.status
py_env_create
python
run_sys_tests
share
src
tools
These directories form the top level of the CLM source tree and will be used throughout the remainder of the tutorial.
If your directory contents differ significantly from those shown above, ask for assistance before proceeding.
Step 2. Examine the CIME Directory#
One of the most important directories in CESM is the CIME directory.
The CIME(Common Infrastructure for Modeling the Earth) directory provides the framework that integrates the CESM component models and manages the workflow for configuring, building, and running simulations.
- Move into the CIME directory:
cd cime
List its contents:
ls -1
You should see several directories, including:
doc
scripts
tools
utils
The most important directory for many CESM users is the scripts directory, which contains the tools used to create and manage cases.
Change into the scripts directory:
cd scripts
List its contents:
ls -l
Notice the following scripts:
create_newcase
create_clone
create_test
query_config
query_testlists
Throughout this tutorial, create_newcase will be one of the most frequently used commands.
Check Your Understanding
What is the purpose of the create_newcase command?
Hint: It is used to create a new CLM experiment (or “case”) that can later be configured, built, and run.
Step 3. Examine the CLM Components Area#
In your terminal window, we will now move to the Components Directory and examine the contents of the individual sub models.
cd /glade/u/home/$USER/code/my_clm_code
OR
Alternatively, you can use the cd ../.. to move up two levels in the directory hierarchy.
cd ../..
Change into the
componentsarea of the code workspace:
cd components
List the contents of the Components Directory:
ls -1
Expected Output:
cdeps
cism
cmeps
mizuRoute
mosart
rtm
Each directory contains the source code for a different Earth system component or supporting infrastructure:
Component |
Description |
|---|---|
CDEPS |
Data components used to provide prescribed atmosphere, ocean, land, ice, and other forcing |
CISM |
Community Ice Sheet Model (land ice) |
CMEPS |
Coupling infrastructure used to exchange information between component models |
datasets |
|
mizuRoute |
River routing model |
MOSART |
Model for Scale Adaptive River Transport |
RTM |
Runoff Transport Model (legacy routing infrastructure) |
Together, these components represent the major elements used for CLM simulations.
Step 4. Look at the CLM Source Code (src)#
As a final exercise, let’s take a quick look at the source code for CLM. The src directory is where most scientific development takes place and is the area you will explore in later exercises, but we’ll take a look at it now
Change into the clm source directory:
cd /glade/u/home/$USER/code/my_clm_code/src
List the contents of the src directory:
ls -l
Expected Output:
CMakeLists.txt
README.unit_testing.md
biogeochem
biogeophys
cpl
drv_test
dyn_subgrid
fates
init_interp
main
self_tests
soilbiogeochem
unit_test_shr
unit_test_stubs
utils
Several of these directories will become important as you begin working with CLM:
Directory |
Purpose |
|---|---|
|
Biogeochemistry source code |
|
Biogeophysics source code |
|
FATES source code |
|
Soil biogeochemistry source code |
Summary#
In this section, you:
Located the CLM source code directory (
$SRCROOT).Explored the CIME infrastructure used to create and manage CLM cases.
Examined the major CLM component models.
Explored the structure of the CLM source code.
Understanding the CLM directory structure will make it easier to navigate the code, locate relevant files, and modify model components in future exercises.
Congratulations! You have completed the CLM code exploration exercise.