
Running VAPOR on Casper#
In this tutorial, we will walk through the process of launching VAPOR on NCAR’s Casper supercomputer. This involves setting up a remote desktop on Casper and connecting to it using a VNC Client.
Prerequisites#
Access to Casper - To access Casper, you will need a user account along with your project code.
VNC Client - You will also need to install a VNC client on your local machine. CISL recommends the TigerVNC client, and provides this video to help users install it: Installing TigerVNC on a Mac laptop.
Connecting to a Remote Desktop#
Start a VNC session on Casper by running the following command in a terminal on your local machine. Replace
YOUR_USERNAMEwith your Casper login andPROJECT_CODEwith the code associated with your project.
ssh -t -l YOUR_USERNAME casper.hpc.ucar.edu /glade/u/apps/opt/vncmgr/bin/vncmgr create VAPOR -A PROJECT_CODE -t 4:00:00
Note
The
-t 4:00:00flag specifies the time the server will run for in HH:MM:SS format. The default is 4 hours and the maximum is 24 hours.For additional options, you can run
vncmgr --helpwhen signed into Casper.
After following the prompts to log in, you should get a message that looks like this:
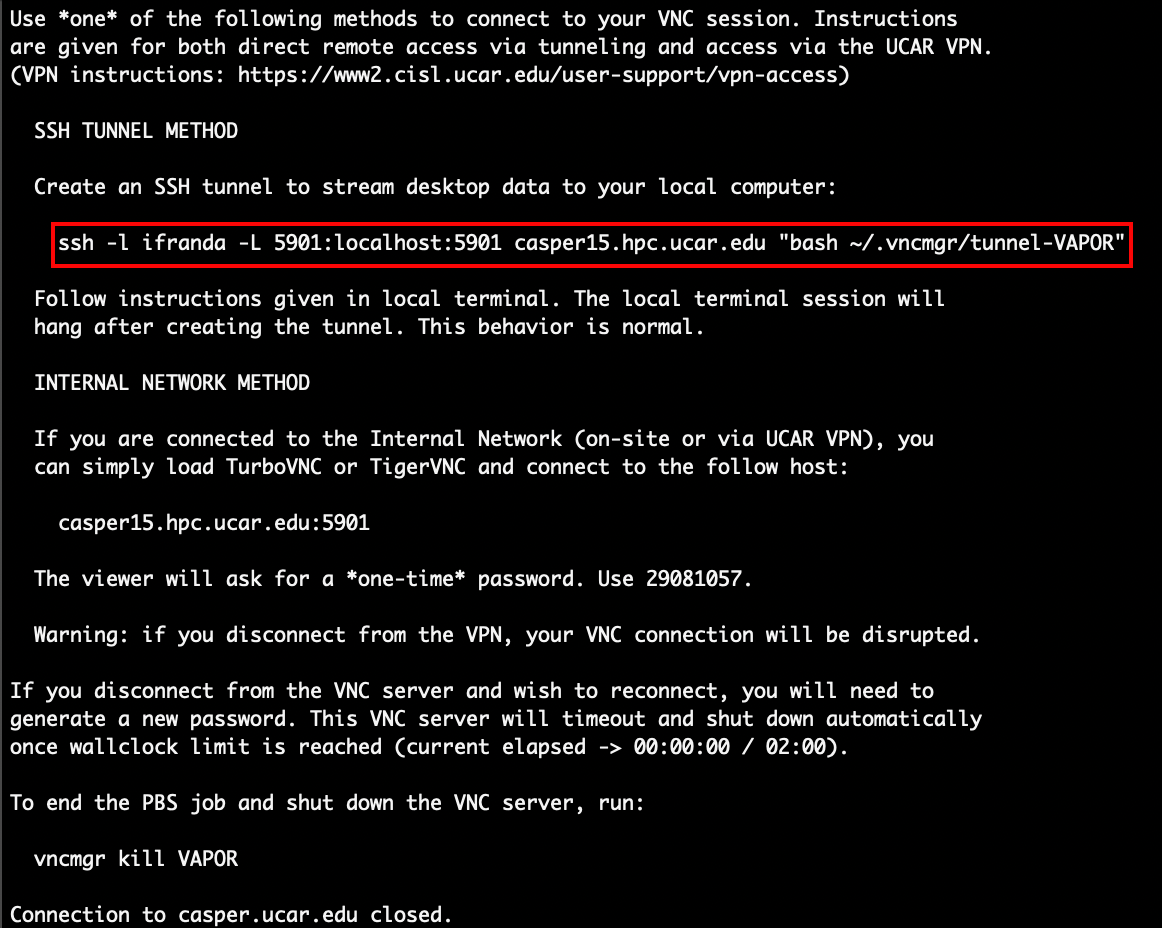
Run the ssh command provided in this message within your local terminal. In the screenshot above, this command is boxed in red. You should see something similar with your login information. After running this command, it will prompt you to log in again. Then, you should get the following message:
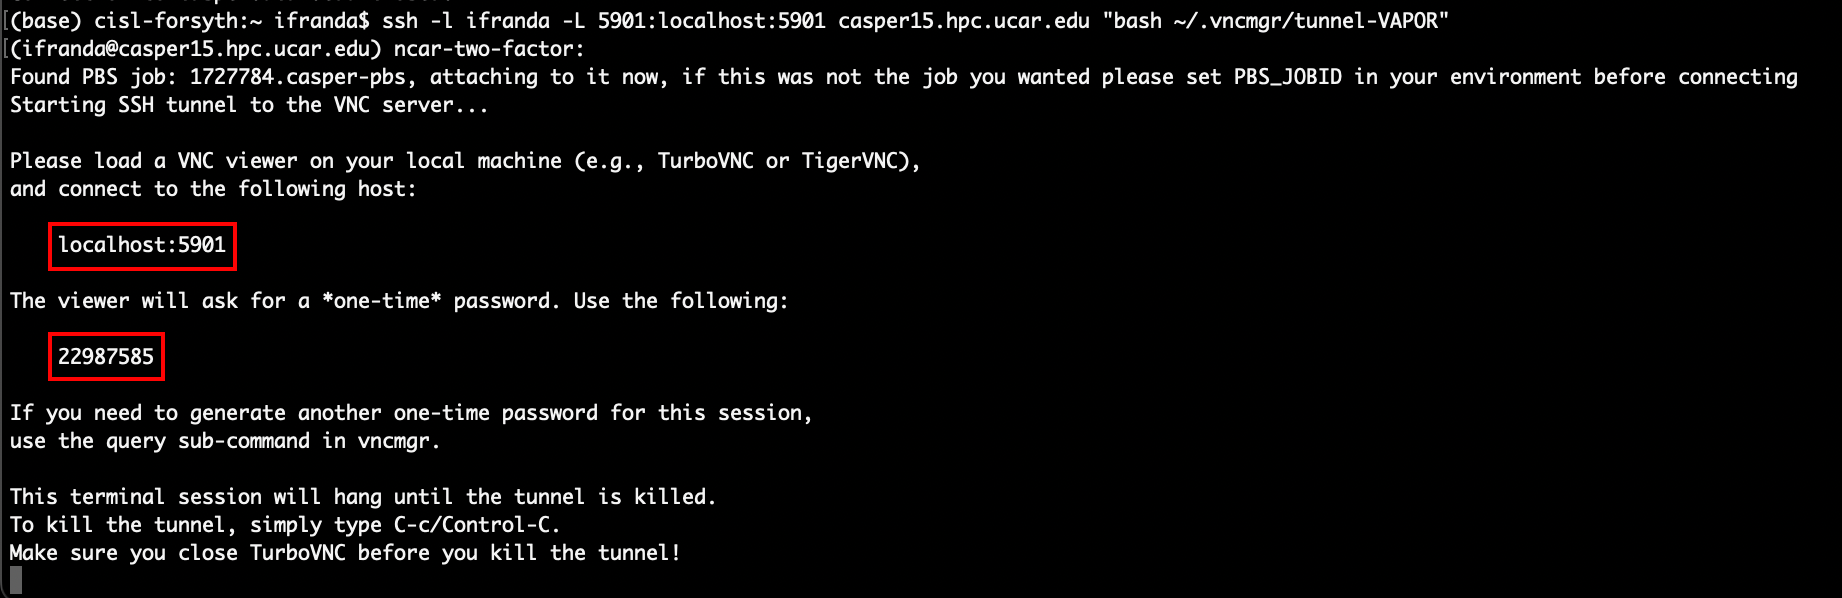
This message will provide you with the localhost information and the one-time password needed to connect to the desktop with your VNC client. Next, use your VNC client to connect to your remote desktop:
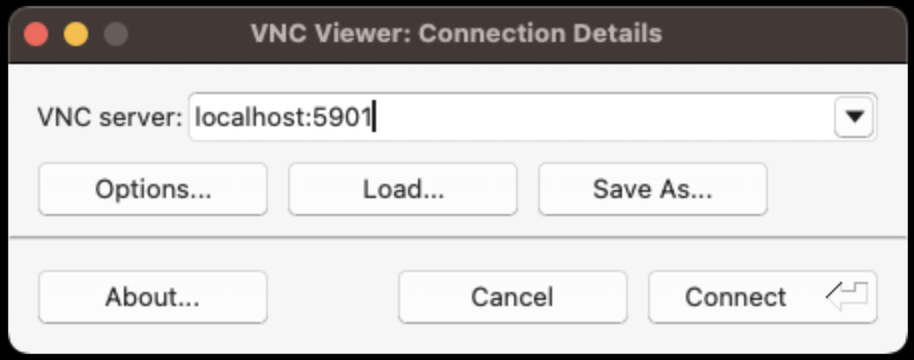
Open your VNC client
Enter the localhost information and click connect
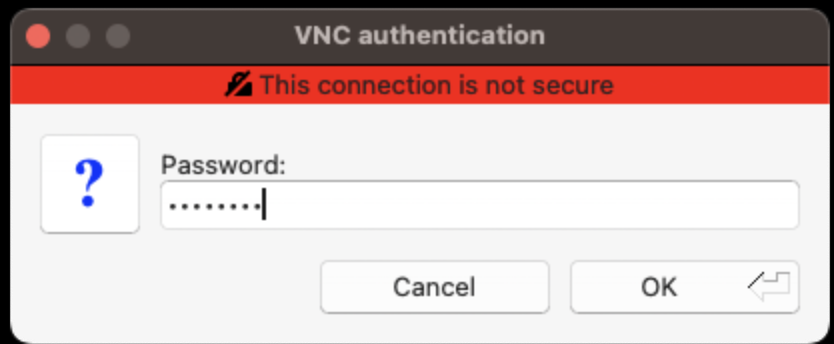
Enter the one-time password
Running VAPOR on your Remote Desktop#
Once you’ve connected to your remote desktop, follow these steps to run VAPOR:
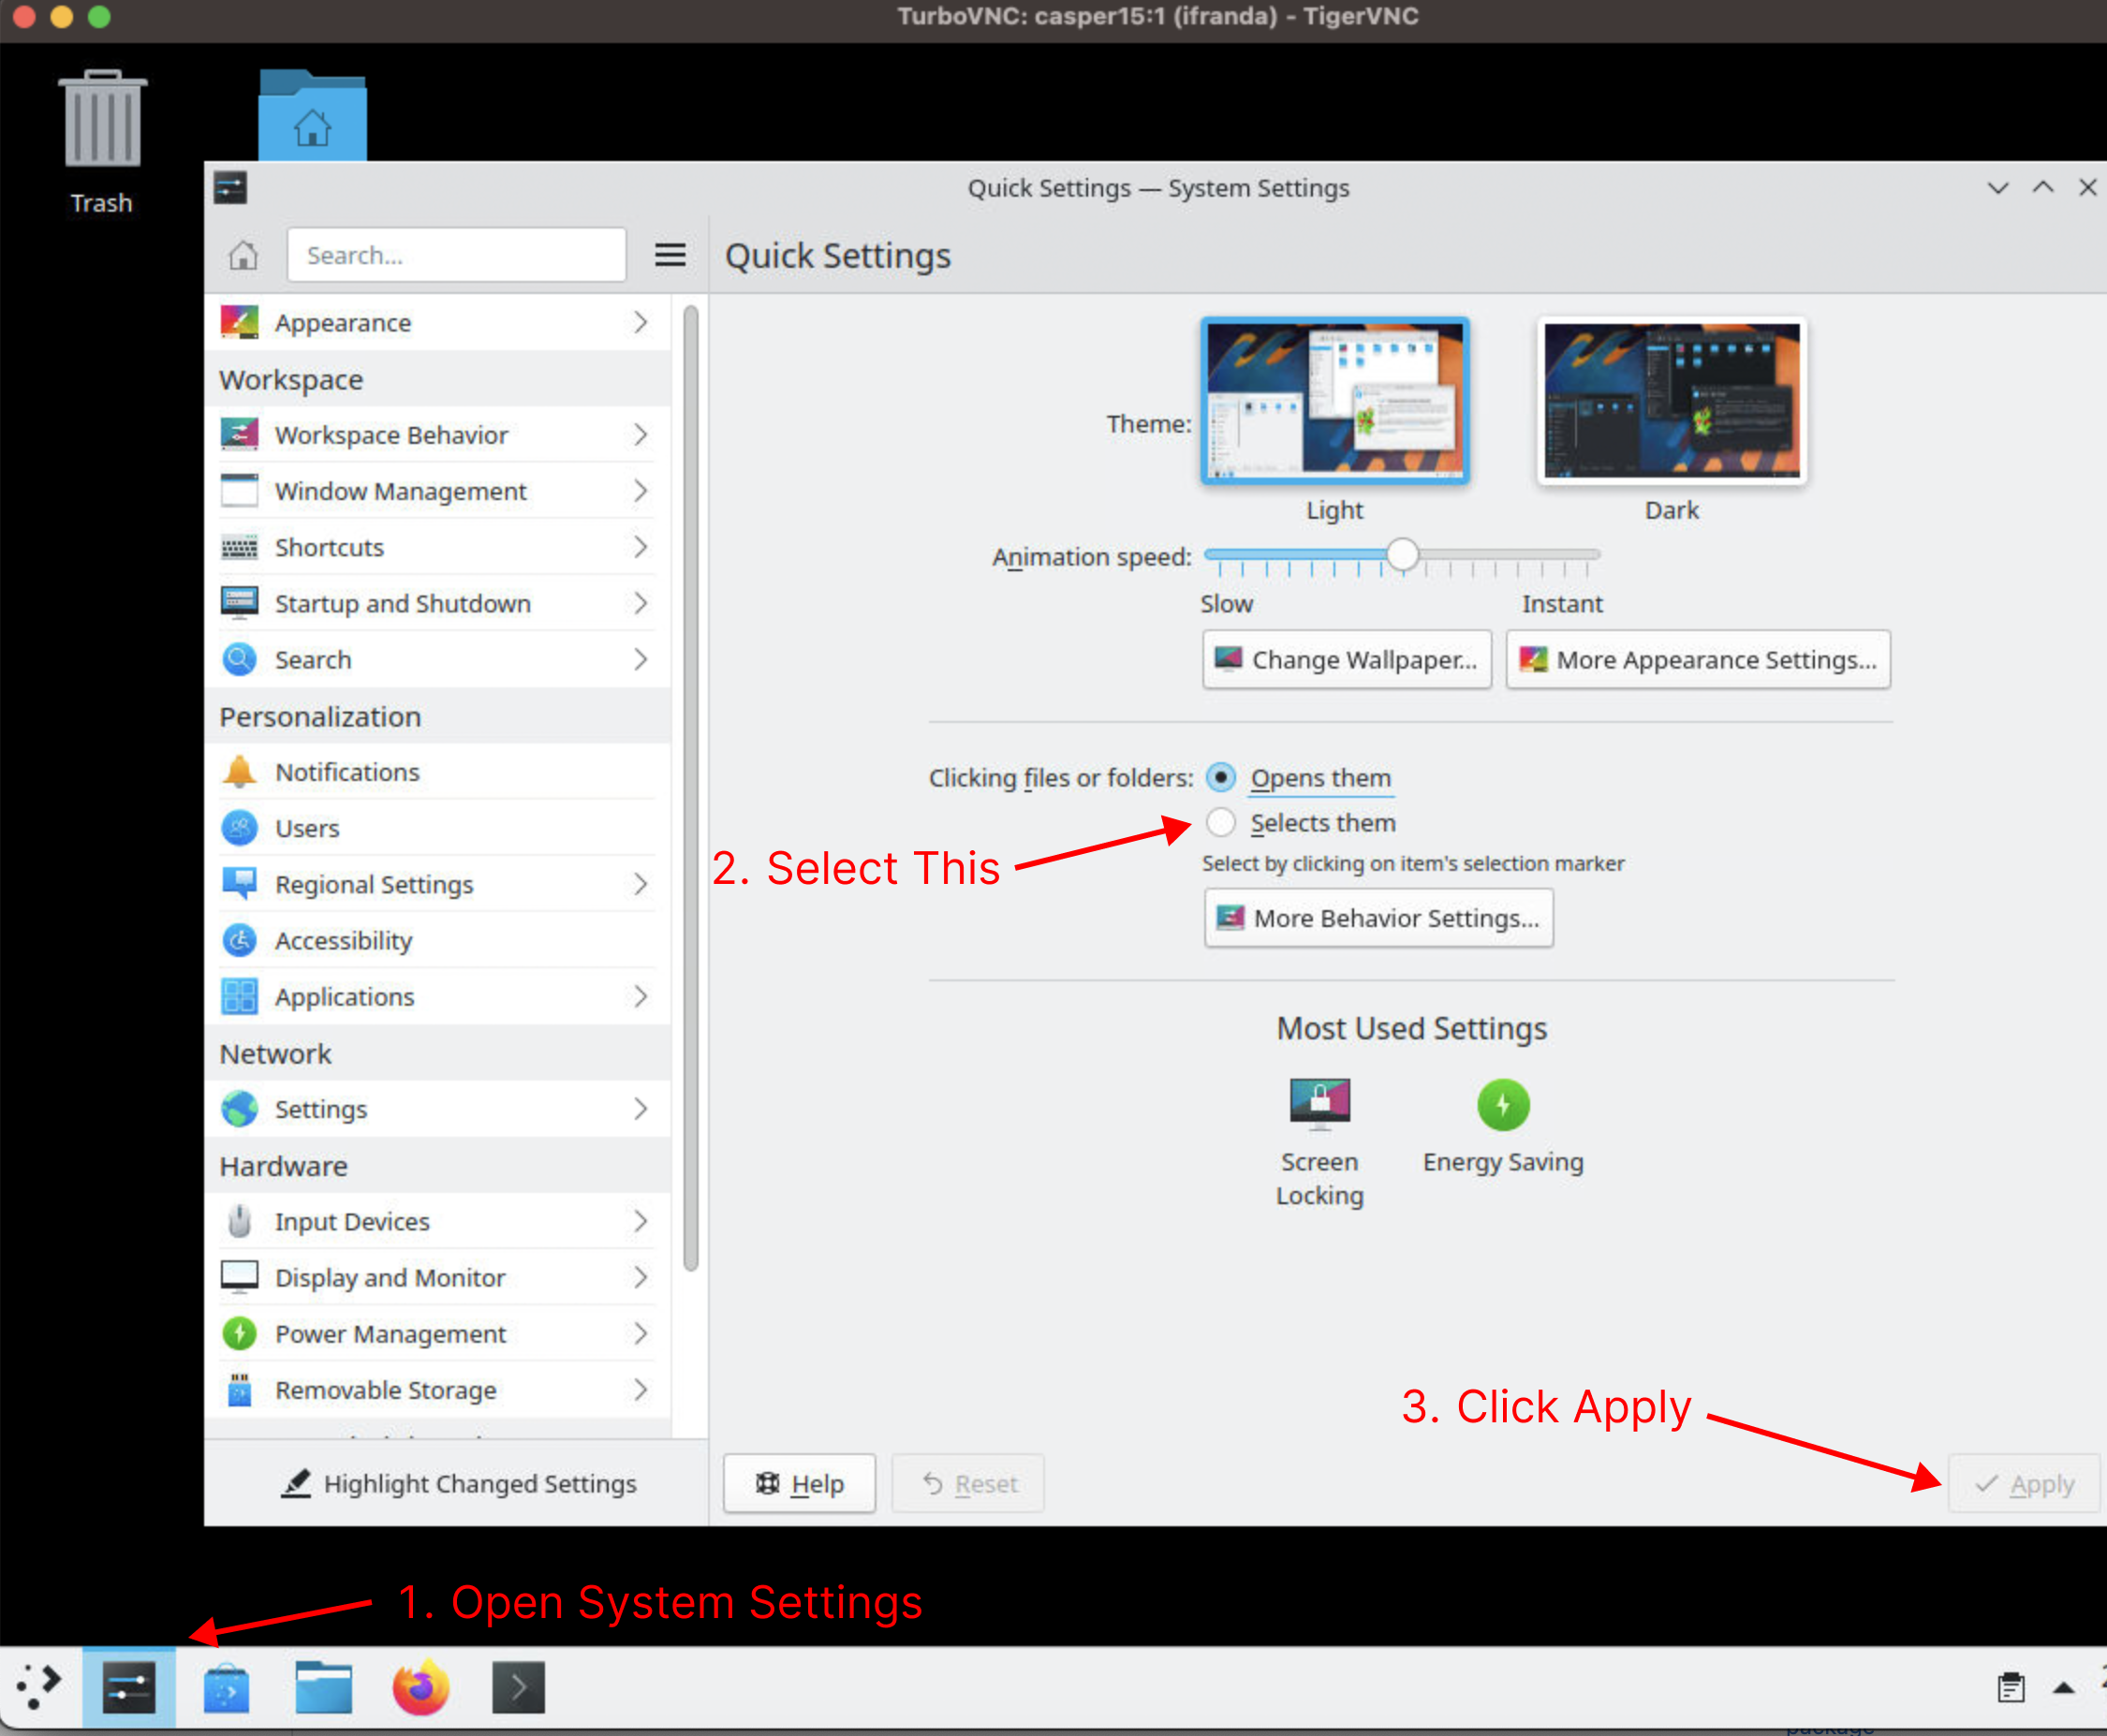
Before launching VAPOR for the first time, it is recommended to change the desktop’s settings for clicking files and folders. This will make it easier to open multi-file datasets. Navigate to “System Settings”, then under “Clicking files or folders” select “Selects them” and click “Apply”. Capser will save your preferences between sessions, so this only needs to be done once.
To run VAPOR, open Konsole from the task bar at the bottom and run the following commands:
module load vapor
vglrun vapor
Ending your Session#
Your remote desktop will use compute resources until either the amount of time you specified has elapsed or until you manually end it. To end your session manually, follow these steps:
Sign into Casper and run the
vncmgrcommand. You will be able to see your active servers that are currently runningType
kill VAPORto end the session named VAPORWait for the session to end
Running Vapor-Python via portforwarding#
Start a VNC session on Casper, just as you would for connecting to a remote desktop.
ssh -t -l YOUR_USERNAME casper.hpc.ucar.edu /glade/u/apps/opt/vncmgr/bin/vncmgr create VAPOR -A PROJECT_CODE -t 4:00:00
Copy the provided ssh line and paste it into your local terminal. We will make two changes. First, remove the last string command “bash ~/.vncmgr/tunnel-VAPOR”. Then, replace the port numbers with the one that matches your jupyter notebook server (typically 8888). When we start the jupyter server in the next step, this number may be different, and we will need to logout and run this line again using the correct port.
After you have successfully logged in, activate your desired conda environment and start a jupyter notebook server.
module load conda
conda activate [env]
jupyter notebook
If you receive a “skipped non-installed server(s)” message you can safely ignore it by pressing ‘q’ then entering ‘y’.
The terminal should provide you with a url you can copy and paste into your browser on your local machine. If the port number does not match the one you used to login, you will need to logout and run step 2 again with the correct port number.