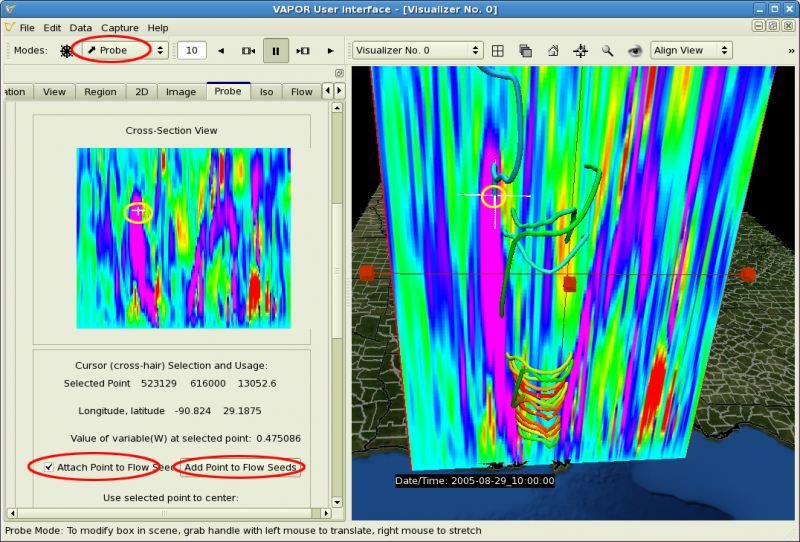
We shall insert flow seed points in the eyewall, identified by the violet regions in the probe image. This will be useful in understanding the wind flow around the hurricane.
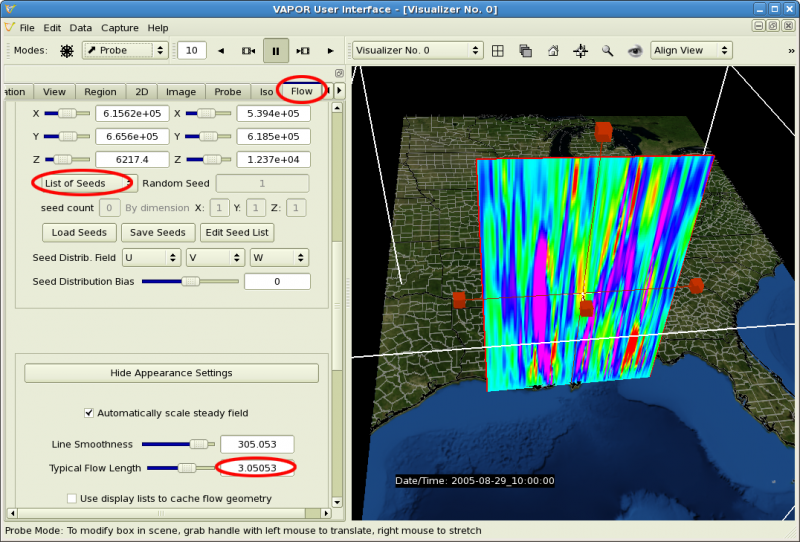
Click on the flow tab. It was previously set up to use random seed points, we need to change that setting.
On the flow tab, in the Flow Seeding Settings, change the "Random Rake" selector to "List of Seeds"
In the Appearance settings, change the "Typical Flow Length" to 3. This will enable us to see longer streamlines.
Near the top of the flow tab, check the "Instance:1" checkbox to enable flow rendering. You will get several warning messages that you can ignore. The Flow panel changes we made are shown below:
Click on the Probe tab. (Note: You should still be in Probe mode, so that the probe is enclosed with a red square in the scene.) In the Image settings in the middle of the Probe panel, in the Cross-Section view, click on a point in one of the violet regions. You will see that there is a 3D cursor at the corresponding location in the 3D scene. That point will be used as a flow seed point.
Below the Cross-Section View, check "Attach Point to Flow Seed". Note that there is now a streamline in the scene that passes through the point you chose.
Continue to select points in the violet (largest positive W) cone of the probe. Each time you select a point, click "Add Point to Flow Seeds".
The following illustrates a streamline that was specified using the Probe:
After you have inserted 10 or so seeds, rotate the scene around and examine the streamlines you created. You will see that, for the most part, the streamlines enter the vortex at the ground level, spiral up along the eye wall, then exit the hurricane at the top. Your VAPOR scene should look like the following:


