
Deploying Applications with ArgoCD#
Note
This section assumes you have a containerized application and a Helm chart to deploy that application to Kubernetes. If you do not have these we do provide documentation on Containerizing Applications and an administrators guide for Deploying with Helm. If you would like some additional guidance feel free to reach out to the team via email.
Argo CD is a continuous delivery application for Kubernetes. It is responsible for deploying and continuously monitoring running applications and comparing their live state with the desired state set in the associated Git repository. Our instance of Argo CD is accessible via the following link : https://argocd.k8s.ucar.edu/.
Note
Argo CD uses CIT LDAP credentials for login. You do not need to specify a domain when logging in, just your username and password. If you have issues accessing Argo CD please open a ticket here
Creating Apps via UI#
Login to UI#
The official Argo CD documentation to install Apps via the UI can be viewed here.
To start, login to the Argo CD UI and select the Log In via ucar.edu button as seen in the image below:

Create a new Project#
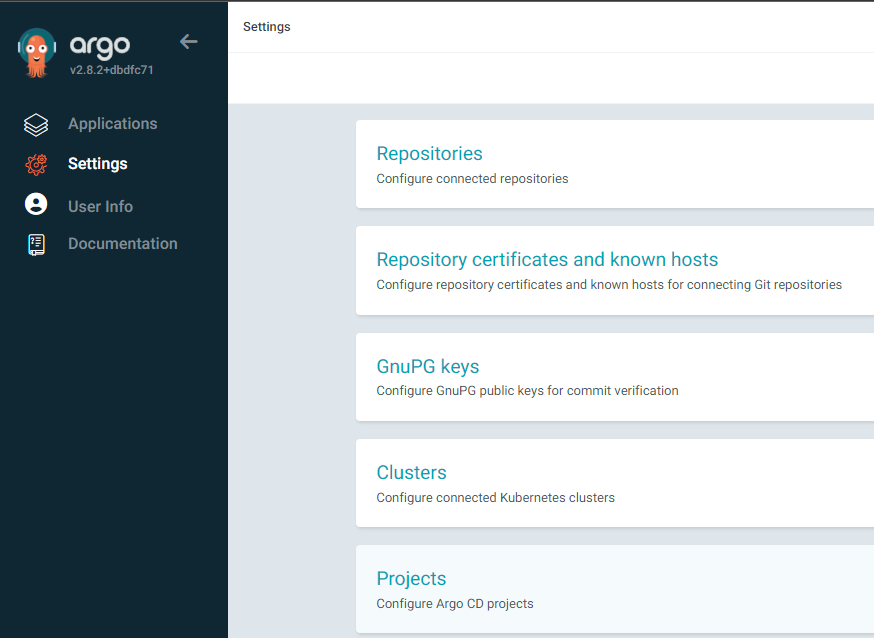
On the left side navigation pane select Settings. When the Settings menu comes up there is an option for Projects a few items down as seen in the image below:
From here you can edit existing projects or create a new one. In the upper left hand of the window is now a box for + NEW PROJECT. Select this to open a new project wizard. The only information that needs to be included in this section is the project name, please use something that includes your sso username or team name, and a Description. Again please try and put in a Description that accurately describes the projects owner and purpose.
Project Settings#
There’s a few options in the project that need to be set to allow our new application to talk to the resources required to deploy. Once you have created a new Project you should be returned to the Project pane inside Settings. If not navigate back to the Projects. Click on the project just created to bring up the different options and settings for that Project. In this panel specifically we are looking to add Source Repositories that we will allow the Project to Pull from, and we are going to add the Destination Kubernetes cluster address and Namespace to deploy our application to. First we are going to add to the Source Repositories section by clicking on EDIT and then ADD SOURCE like in the image below:
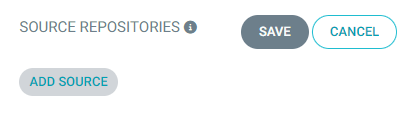
This will bring up a line with a wildcard * in it. Change this to be the repository URL, with .git at the end, that you are going to use for your Application. Click SAVE after entering your repository URL. This permits your project to connect to that repository. The other option that we need to fill in is for Destinations. This is the location of the Kubernetes cluster and namespace that you are going to deploy your application to.
Note
If you do not have a namespace in the Kubernetes cluster to deploy your application to please see the Documentation here
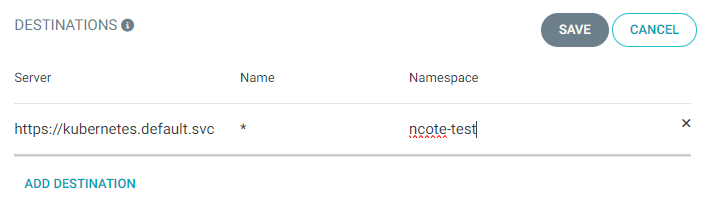
The Server URL will be https://kubernetes.default.svc, the Name can stay as a wildcard *, but the namespace should be changed to you, or your teams, namespace in k8s. The final input should look similar to the image below:
Your Argo CD project should now be setup to deploy an Application to.
Create a new App#
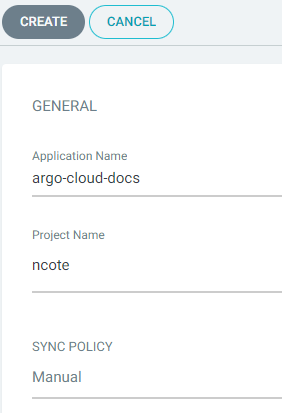
On the Applications main pane there is a box in the upper left for + NEW APP. Click on this box to bring up the new app wizard. The first section you will fill out sets the Application Name, Project Name, and the Sync Policy. Please set the Application Name to something unique and descriptive for your application. The Project Name should be set as the project created in the previous steps, you will not have permissions to deploy to the default project. The Sync Policy should be set to Manual so you can control when your application is updated and Sync’d. An example of what this looks like filled out can be seen in the image below:
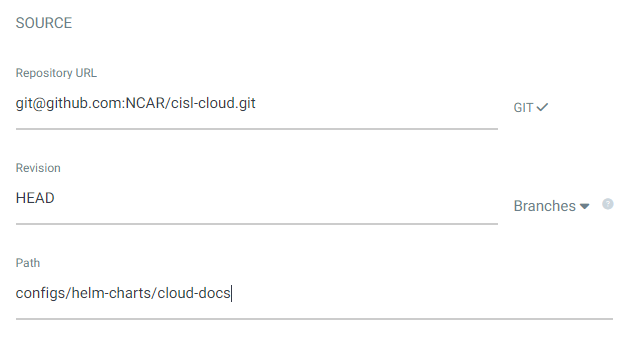
The next section contains a lot of check boxes for different values. For an initial basic deployment we are going to leave all of these unchecked for now and skip down to the SOURCE section. Provide the URL to the Git repository that was added to the Project Source Repositories, it should now be in a dropdown menu that you can select. Leave the Revision as HEAD to use the most recent commit, and the path should be the path to the directory that contains your applications Chart.yaml file. This should end up looking similar to the image below:
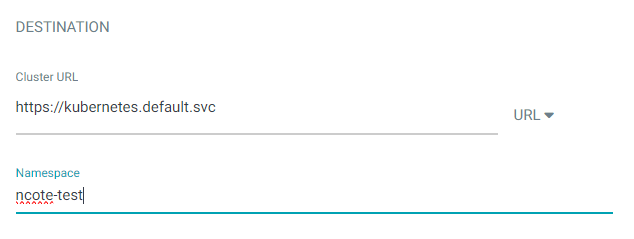
The last piece that is required to deploy your application is the Destination. This will include the Cluster URL that was set in the Project options earlier. It should appear in the dropdown menu and is https://kubernetes.default.svc. Supply your namespace below the URL. It will look similar to the image below:
With those fields filled out we are ready to create the Application. In the upper left select the CREATE button. Your Application should now be deployed!
If you have any issues or hit any errors during this rollout please submit a ticket here and a member of the team will reach out to assist you.
Creating Apps via CLI#
Note
In order to use the Argo CD CLI it needs to be installed. Documentation on installing the Argo CD CLI can be found on the Argo CD CLI Installation page.
Login with argocd CLI#
In order to use the Argo CD CLI against our Argo CD instance we have to login first. This is accomplished using the following command:
argocd login argocd.k8s.ucar.edu --sso
This should open your browser window and allow you to login with your CIT username and password. There is no need to specify a domain in the username. The browser may not close automatically, but you should see a message in the CLI that the authentication was successful.
$ argocd login argocd.k8s.ucar.edu --sso
WARN[0000] Failed to invoke grpc call. Use flag --grpc-web in grpc calls. To avoid this warning message, use flag --grpc-web.
Opening browser for authentication
Performing authorization_code flow login: https://argocd.k8s.ucar.edu/api/dex/auth?access_type=offline&client_id=argo-cd-cli&code_challenge=E-DAMqj-piUxFnmeGqxlKeLK-dnvrfrViqPd3xJXMbQ&code_challenge_method=S256&redirect_uri=http%3A%2F%2Flocalhost%3A8085%2Fauth%2Fcallback&response_type=code&scope=openid+profile+email+groups+offline_access&state=RiIXoIgADDsnBblZmIlNoLPb
Authentication successful
'ncote@ucar.edu' logged in successfully
Context 'argocd.k8s.ucar.edu' updated
Create Project with argocd CLI#
Now that we are logged in we can create a new project to host our application in Argo CD. The full documentation from Argo CD on using the CLI for Project manipulation can be found at this link. If you have an existing project already that you would like to deploy to you can skip to the next steps. The command to create a new project specifies the project name, the k8s cluster and namespace to deploy to, and the Git repository that is permitted to be the source for your project. An example of what this would look like can be seen below:
argocd proj create ncote-test -d https://kubernetes.default.svc,ncote-test -s https://github.com/NicholasCote/CCPPdocs.git
Your project should now be created. You can verify this by looking in the UI or with the command argocd proj list
Create Application with argocd CLI#
With an existing Argo CD project that is scoped to include any Git repositories and k8s clusters we want to deploy to we are ready to deploy an application. In addition to the variables we’ve already determined setting up the Project we will need to provide a descriptive name for our application as well as the repository path to teh Chart.yaml file for our application. An example of the command syntax and an application deployment can be seen in the code block below:
argocd app create <app_name> --repo <repo URL - https> --path <path_to_folder_containing_chart.yaml> --dest-server https://kubernetes.default.svc --dest-namespace <any-allowed-namespace>
argocd app create ncote-test-docs --repo https://github.com/NicholasCote/CCPPdocs.git --path jbook-helm --dest-server https://kubernetes.default.svc --dest-namespace ncote-test
If all was successful you should see a message stating that the application was deployed successfully. You can view all deployed applications with the command argocd app list
That should be all that is needed to get started deploying applications with Argo CD.