
Update your Argo CD Application#
Note
This document is assuming that your applications Sync Policy is set to Manual and not Automatic. If the Sync Policy is set to Automatic updates should be pushed automatically.
When you make a change to your helm chart or repository Argo CD will pick up on these changes and will assist you in rolling out an update. After you have pushed the changes to your Git repository the status of your Application will change to OutOfSync. You can view this in the UI or the CLI. We will go over the steps for both.
Update via CLI#
To start let’s run argocd app list to confirm that our Application is out of sync. In the code block below is an example of an Application whose status is OutOfSync
$ argocd app list
NAME                        CLUSTER                         NAMESPACE   PROJECT  STATUS     HEALTH   SYNCPOLICY  CONDITIONS  REPO                                               PATH                                 TARGET
argocd/argo-cloud-docs      https://kubernetes.default.svc  ncote-test  ncote    OutOfSync  Healthy  <none>      <none>      git@github.com:NCAR/cisl-cloud.git                 configs/helm-charts/cloud-docs       HEAD
In order to update this Application so that is Synced we only need to run the following command:
argocd app sync argo-cloud-docs
In the example above argo-cloud-docs is the name of the application that we wanted to sync. When this is run we get a large amount of output that provides us information on what was updated in our application and if it was successful. As long as there were no issues you should see a Message: line near the bottom of the output that states successfully synced (all tasks run)
Update via UI#
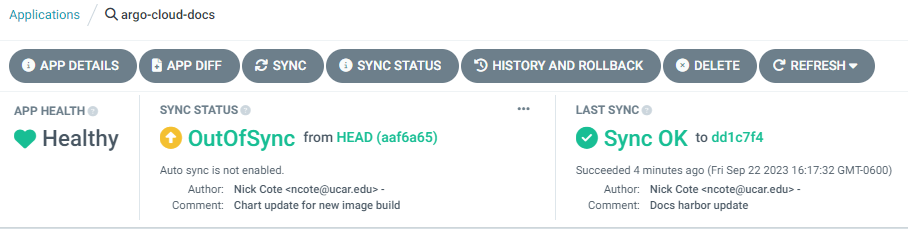
If you navigate to your application in the Argo CD UI you should see that it is reporting a Sync Status of OutOfSync. If you have pushed changes to your Git repository and Helm chart but the status is still Synced click the REFRESH button. It should now accurately reflect that your application is out of sync with your repository. An example of what this looks like can be seen in the image below:
In order to update the Application we just have to select the SYNC box at the top of the Applications window. It will provide a new list of options that we can pick and choose from. For a simple in-place update of our application, assuming we’ve tested all our changes successfully before trying to update our application, the default values supplied here are fine. Hit the SYNCHRONIZE button at the top of the window that opened on the right side of our screen. It will spin for a few seconds before updating the status of our application. As long as everything worked correctly our new status should be Synced. Please visit your application now to test that the changes have been applied and everything is working correctly.
Rollback#
Note
If your application has auto-sync enabled it will be disabled for a rollback. You will have to re-enable auto-sync
If there was an issue deploying your application and you need to rollback any of these updates there is a rollback option in both the UI and the CLI.
CLI#
An example of the CLI command to accomplish this for the argo-cloud-docs app can be seen below:
argocd app rollback argo-cloud-docs
UI#
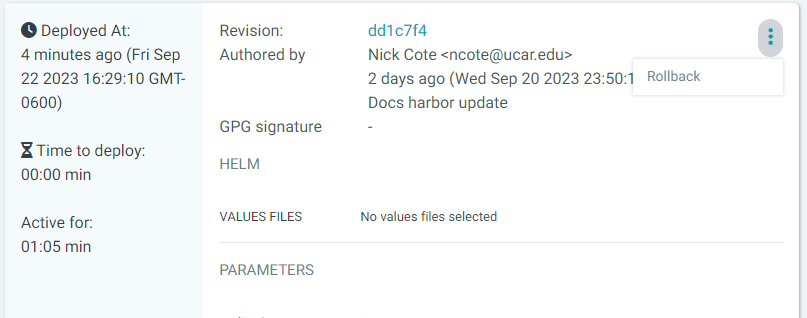
In the UI, at the top of the Applications window where we hit SYNC to update our app, is another button labeled HISTORY AND ROLLBACK. Select this button to get a list of all the different revisions you can rollback to. Pick the most recent version that worked, or the specific version you want to rollback to, and in the upper right hand corner are 3 dots. If you click this button there is now an option to Rollback. Select this and your application will rollback. An example of what this looks like can be seen in the image below:
Your application should now show a status of OutOfSync. Check your applications interface to make sure that the changes have been reverted back to the state you wanted.