Workspaces#
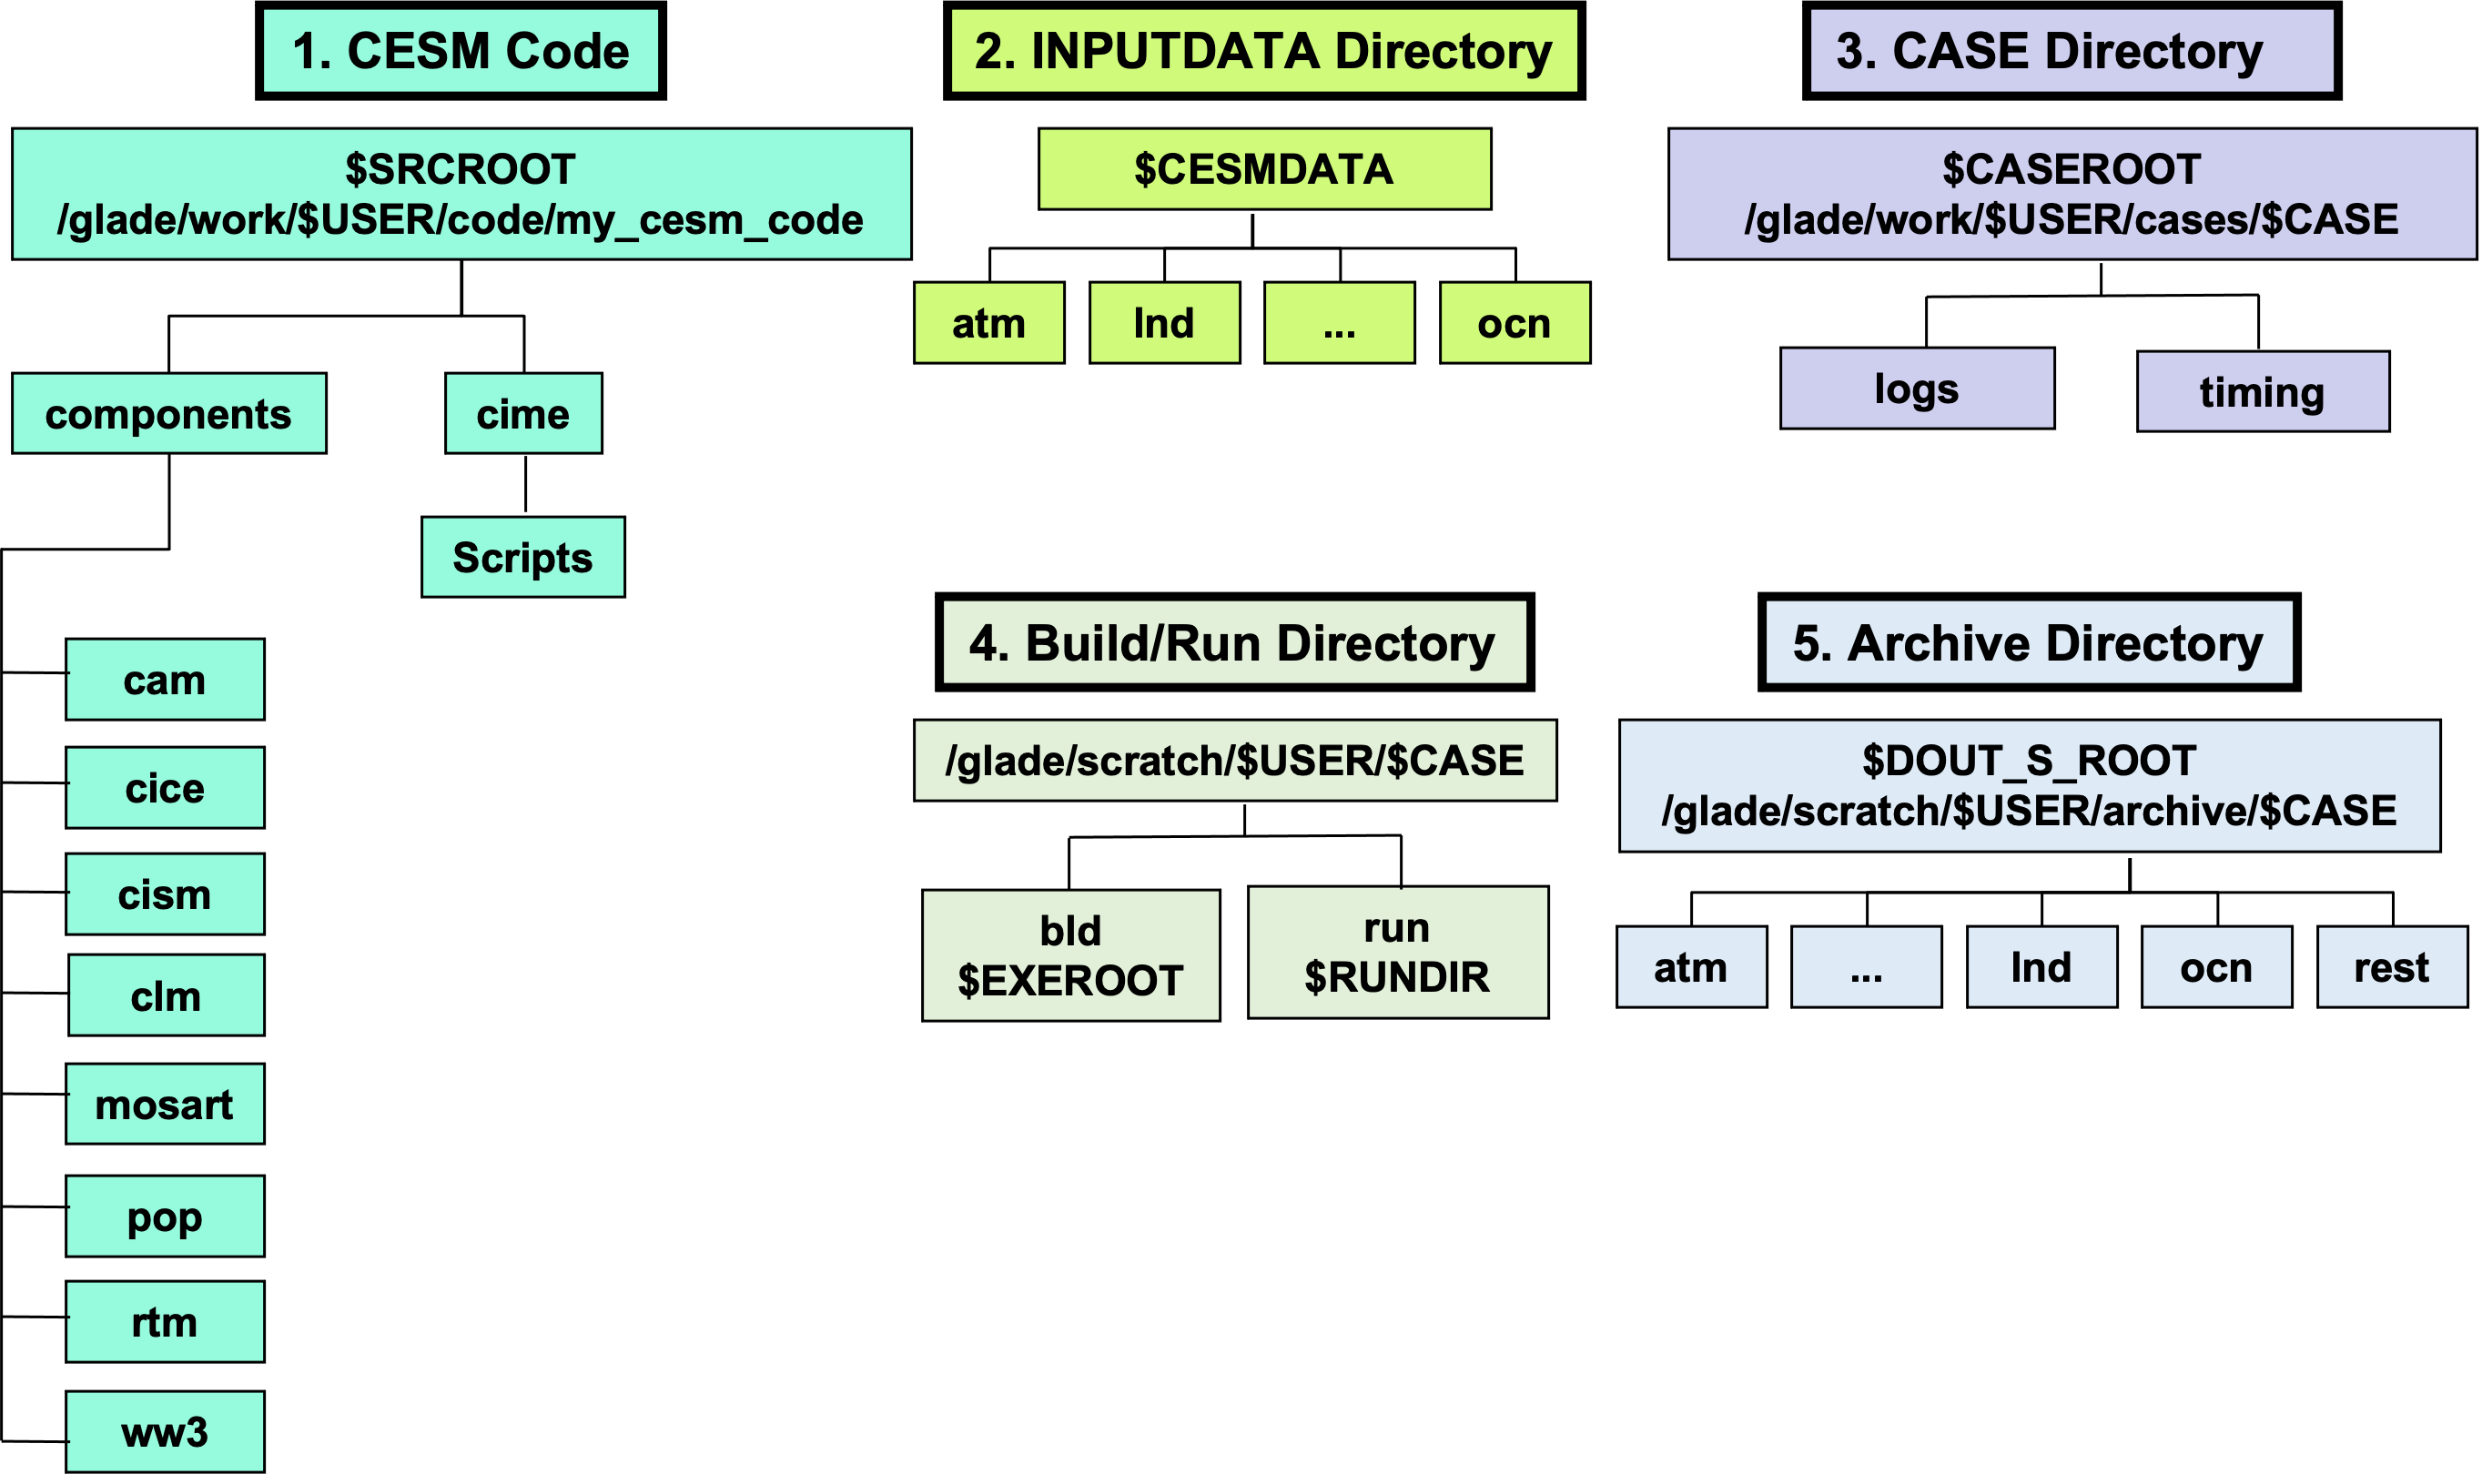
Utilizing the CESM requires knowledge of the model directory structure. The CESM model consists of five main directory tree areas that make up the CESM Workspace.
One of the key elements of the Tutorial will be learning where each of these workspace elements are located and how to use them to setup, build, run and analyze the output of model simulations.
There are 5 main directories (see figure, below) you will need to navigate:
The path to your CESM source code. This is referred to as
$SRCROOT(or$CESMCODE) and contains the$CIMEROOT.The path to the input data, referred to as
$CESMDATA.The path to your experiment case directories. This is referred to as
$CASEROOT.The path to your build and run directories, referred to as the
$EXEROOTand$RUNDIR, respectively.The path to your archived model output, referred to as
$DOUT_S_ROOT.
We will investigate these in more detail in the remainder of the Tutorial.
Note on Terminology
Paths are the directions to the location of different pieces of your workspace.
Roots are saved paths that point to a specific piece of the model.
Workspace Overview#
Figure: Overview of the CESM2 Workspace Directories 
For the current tutorial on Derecho, the paths are:
$SRCROOT=/glade/u/home/$USER/code/my_cesm_code$DIN_LOC_ROOT=/glade/campaign/cesm/cesmdata/cseg/inputdata$CASEROOT=/glade/u/home/$USER/cases/$CASE$CIME_OUTPUT_ROOT=/glade/derecho/scratch/$USER$EXEROOT=/glade/derecho/scratch/$USER/$CASE/bld$RUNDIR=/glade/derecho/scratch/$USER/$CASE/run$DOUT_S_ROOT=/glade/derecho/scratch/$USER/archive/$CASE
Each of these directories contains sub-directories. You will need to learn to navigate between these directories.
Setting your workspaces#
You will need to create a directory for the CESM code and a directory where you will keep all your cases.
In the CESM jargon, a case refers to a specific instance of a model simulation.
Create CESM Code Directory
Create a workspace location where you can put your CESM code in the GLADE file system on Derecho. In all exercises in this tutorial $USER is a placeholder and you should use your NCAR HPC login name when completing the exercise.
cd /glade/u/home/$USER
mkdir code
Create Cases Workspace Location
Create a workspace location where all your cases from this tutorial will be located in the GLADE file system on Derecho.
cd /glade/u/home/$USER
mkdir cases
Other Workspace Locations
The CESMDATA directory does not need to be set up directly on NCAR HPC systems as these data are in a common directory.
We will not directly set up your Build/Run or Archive workspace locations. These directories will be automatically created when you create a CESM case.
